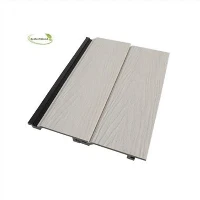
As a supplier of solid decking, I understand that dealing with damaged decking boards is an inevitable part of maintaining a beautiful and functional outdoor space. Whether it's due to weather, wear and tear, or an accidental impact, a damaged board can detract from the overall appearance and safety of your deck. In this blog post, I'll share a step-by-step guide on how to remove a damaged solid decking board, along with some tips to make the process as smooth as possible.
Step 1: Gather Your Tools
Before you start removing the damaged decking board, you'll need to gather the necessary tools. Here's what you'll need:
- Safety glasses and gloves: Protect your eyes and hands from debris and splinters.
- Measuring tape: To measure the length of the board and ensure a proper fit for the replacement.
- Circular saw or handsaw: To cut through the damaged board.
- Pry bar: To remove the nails or screws holding the board in place.
- Hammer or drill: Depending on whether the decking is nailed or screwed down.
- Replacement decking board: Make sure to choose a board that matches the existing decking in terms of color, size, and material.
Step 2: Assess the Damage
Take a close look at the damaged decking board to determine the extent of the damage. If the damage is minor, such as a small crack or split, you may be able to repair it instead of replacing the entire board. However, if the damage is significant, such as a large hole or a broken section, replacement is the best option.
Step 3: Remove the Fasteners
If the decking is nailed down, use a pry bar to carefully remove the nails from the damaged board. Start at one end of the board and work your way towards the other, using the pry bar to lift the board slightly and expose the nails. Once the nails are removed, set them aside for reuse or disposal.
If the decking is screwed down, use a drill to remove the screws. Make sure to keep the screws organized and set them aside for reuse or disposal.


Step 4: Cut the Damaged Board
If the damaged board is too long to remove in one piece, you'll need to cut it into smaller sections. Use a circular saw or a handsaw to make a straight cut through the board, following the lines of the existing joints. Make sure to wear safety glasses and gloves to protect yourself from debris and splinters.
Step 5: Remove the Damaged Board
Once the fasteners are removed and the board is cut, you should be able to lift the damaged board out of place. If the board is stuck, use a pry bar to gently lift it up and remove it from the deck.
Step 6: Prepare the Area
Before installing the replacement decking board, you'll need to prepare the area where the damaged board was removed. Use a pry bar to remove any remaining nails or screws from the joists, and use a hammer or a block of wood to flatten any raised areas on the joists.
Step 7: Install the Replacement Board
Place the replacement decking board in the empty space where the damaged board was removed, and make sure it fits snugly against the other boards. Use a measuring tape to ensure that the board is centered and level, and use a pencil to mark the locations of the joists on the board.
If the decking is nailed down, use a hammer to drive nails through the board and into the joists at the marked locations. Make sure to use nails that are long enough to penetrate the board and the joist, but not so long that they protrude through the bottom of the joist.
If the decking is screwed down, use a drill to drive screws through the board and into the joists at the marked locations. Make sure to use screws that are the appropriate length and type for the decking material.
Step 8: Finish the Installation
Once the replacement board is installed, use a saw to trim any excess length from the board, and use a sander or a file to smooth the edges of the board. Make sure to clean up any debris or sawdust from the deck, and inspect the area to ensure that the replacement board is installed correctly and securely.
Tips for Removing a Damaged Solid Decking Board
- Work carefully: Removing a damaged decking board can be a messy and potentially dangerous job, so it's important to work carefully and follow all safety precautions. Wear safety glasses and gloves, and use the appropriate tools for the job.
- Take your time: Don't rush the process of removing the damaged board. Take your time to ensure that the fasteners are removed properly and that the board is cut and removed safely.
- Use the right tools: Make sure to use the right tools for the job, such as a circular saw or a handsaw for cutting the board, and a pry bar or a drill for removing the fasteners.
- Choose the right replacement board: When choosing a replacement board, make sure to choose a board that matches the existing decking in terms of color, size, and material. This will ensure that the replacement board blends in seamlessly with the rest of the deck.
- Consider hiring a professional: If you're not comfortable removing a damaged decking board yourself, or if the damage is extensive, consider hiring a professional deck contractor to do the job for you. A professional contractor will have the experience and tools necessary to remove the damaged board safely and efficiently.
Conclusion
Removing a damaged solid decking board is a relatively simple process that can be done by most homeowners with a few basic tools and some patience. By following the steps outlined in this blog post, you can remove a damaged board and install a replacement board in no time, restoring the beauty and functionality of your deck.
If you're in the market for solid decking or other 3d Wall Panel WPC Building Material, Environmentally Friendly Wall Panel for Kindergarten, or Decorative Siding Decorative Cladding WPC Wall Panel, please don't hesitate to contact me. I'd be happy to help you find the perfect products for your project and answer any questions you may have.